Skinner’s Den

Discussion and information relevant to creating special missions, new ships, skins etc.

Moderators: another_commander, winston

User avatar
Simon B
---- E L I T E ----
---- E L I T E ----
Posts: 836
Joined: Thu Oct 23, 2008 5:54 am
Location: Red Beach NZ
Contact:

GIMP version

Post by Simon B »

Textures in the GIMP
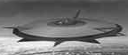
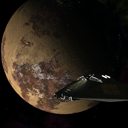
Time to show these photoshop junkies how it's done ... the idea is to seamlessly skin an asteroid or somesuch... so first we get some craters (any google for "cratered terrain" gets you a gaggleful - read the license terms carefully - many many images are proprietary.)


Image


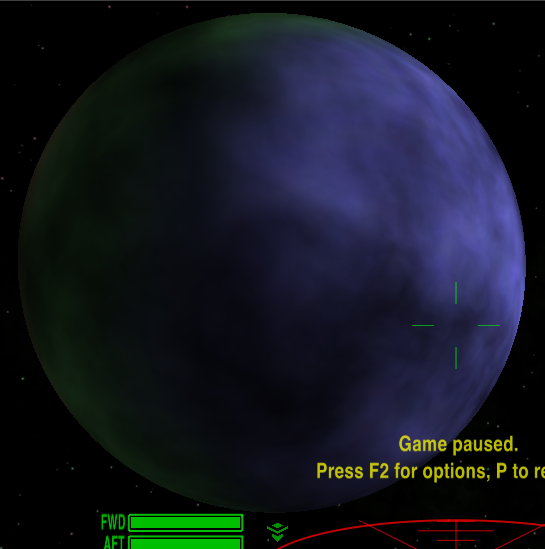
... this texture will create nasty seam-lines in an asteroid model (thinks: should produce asteroid examples... I'll interleave them later - stay tuned.)

... the GIMP has a nice collection of tools and macros courtesy the Image Magic back-end. (All this can be automated to a script if you have to do lots of them.) One of them is called "make seamless".

rt-click on the image to get the context menu - then go to
filters > map > make seamless

The filter is applied to the current layer.

Image

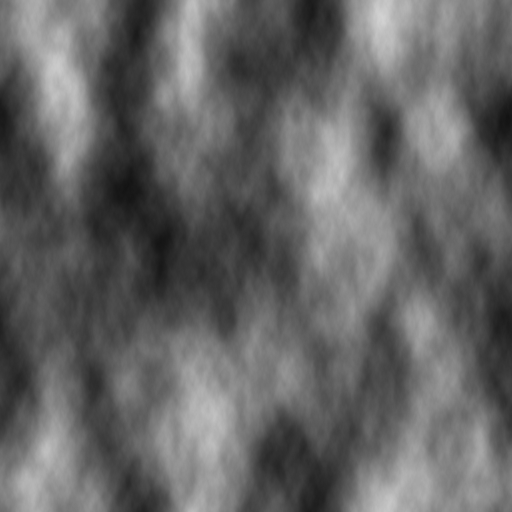
...much better - all the GIMP has done is automate the process in the previous examples. Can you see the artifacts?


Image
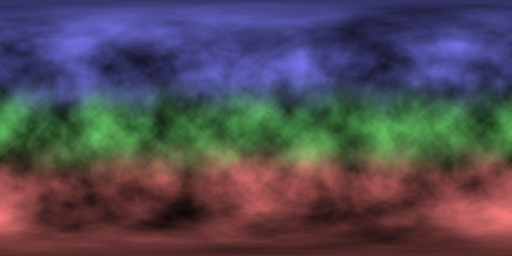
... the basic tessellation parallelogram (in black) is a rectangle, and smaller than the original image. On large textures this creates a boxy/wallpaper effect (stand back from a large papered wall to see what I mean). More annoying, to me, is the dark diamond (green) which makes a mess of any large texture, especially natural ones.

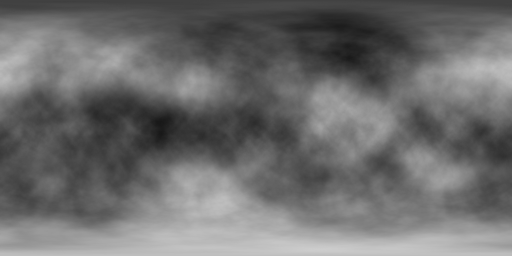
I usually end up scaling the texture so only about 1.5 - 2 tesselations run to each side. But there is an alternative. If the default GIMP does not what you want, there are many plugins. One such is called "texturise" which attempts to reduce the impact of such artifacts by rotating and overlapping parts of the image:

Installing it puts a "texturise" filter in the filters submenu. Calling it gets you to a special dialog where you can adjust the effects as you need them:

Image
... for the sake of this tutorial, I'm accepting the defaults. Notice you can, if you want, create a 512x512 final image and reduce instances of repetition within the texture by reducing the overlap length.

Image
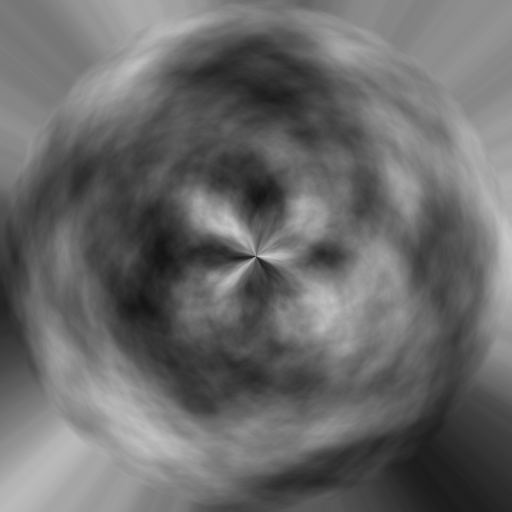
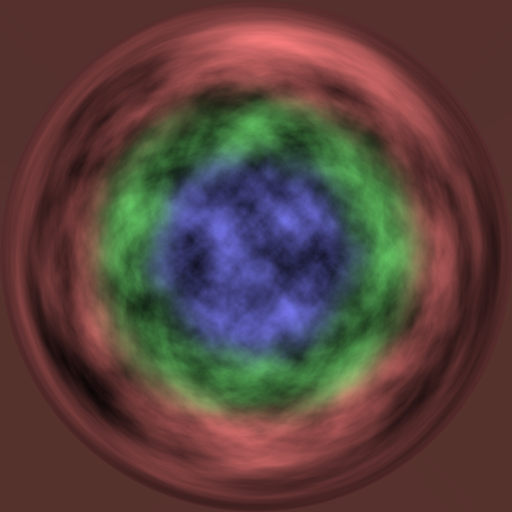
... see? No more diamond and the repetitions are no longer square. The process is longer than the "make seamless" one, which is quite adequate for small, low-res, textures.

In all fairness, there are still artifacts:

Image
... there is a pseudo-tessellation-box (black) and you get a repeating tractor-chevron effect in the dark seams. Notice though that the dark diamond is gone completely, and the actual chevron lines vary angle and width slightly (the green boxes are all constant size and orientation), also, they don't quite follow lines.

The exact tweak needed to get a decent texture depends on the base pattern. You gotta play.

-----------------
Afterward
- the resulting image can be saved to a pattern, so you can bucket-fill whole areas with it.
- anything in the notepad (i.e. anything you cut or copy) is automatically saved as a brush - select it from the brushes dialog and paint with it (the exact effect varies with the paint tool - the equivalent of photoshop clone stamp, IIRC, is to use the pencil.)
Simon Bridge
[re2dux] [neolite]
"Everything is perfect down to every last flaw..."
HBT: The Book of Verse - Principia Discordia
User avatar
Simon B
---- E L I T E ----
---- E L I T E ----
Posts: 836
Joined: Thu Oct 23, 2008 5:54 am
Location: Red Beach NZ
Contact:

Post by Simon B »

The biggest problem with seamless maps is not actually making the picture tileable - it comes when the map is fitted over a mesh. The default mesh for the asteroids, for eg, have nasty artifacts at each end ... an improvement would be to do a spherical projection ... but not worked ou haw that is done in wings yet.

Meantime, I leave you with two moons - animated so you can appreciate the different methods:

Image
... for this one, the seamless texture was used as a pattern to fill a 512x512 texture. The result was run, once more, through the make seamless filter, then applied to a sphere.

Image
... here the texturize method was used to create a 512x512 texture with a 50px overlay, from the same base image as above. The image was created tileable so no further processing was needed.

Notice:
the craters looked bumped-out - this is because I stuffed up the light angle, redoing it with the texture upsid-down should fix without too much work. However, this highlights a problem with cratered textures in oo-lite:

The effect depends on the light angle.

So the whole thing gets spoiled when you fly to the other side ...

This is where normal-maps can have a great impact. The actuar greyscale lunarscapes here are not much use because the tones are on the sides of the craters (light and dark on opposite sides). However, it should be possible to create an artificial set of height-maps (light is higher than dark) for craters to help create asteroid and moon normal maps.

So - it may be that I will redo the asteroid textures for the neolite oxp after all <sigh>.
Simon Bridge
[re2dux] [neolite]
"Everything is perfect down to every last flaw..."
HBT: The Book of Verse - Principia Discordia
User avatar
Simon B
---- E L I T E ----
---- E L I T E ----
Posts: 836
Joined: Thu Oct 23, 2008 5:54 am
Location: Red Beach NZ
Contact:

Post by Simon B »

Frame wrote:
Advanced Seamsless Photoshop Tutorial...

http://www.biorust.com/tutorials/detail/160/en/
This is a tricky process which involves a lot of painstaking manual erasure. Works well with a fiddly-busy image with lots of hard solid-color lines to cut around, but will be obvious used on pics with lots of smooth gradients like the lunar pictures used here.

The example hides the cut lines in the details.

For smoother gradients you need to smudge out sharp changes in tone (and/or color, texture, etc) - another painstaking process... or suffer the detail-loss from a blur tool.

The advantage is you will get a tileable area close to the size of the original image, where the quarter-the-image methods reduce this to about half.

I still don't believe photoshop has no tool to automate this?

Anyhoo - there is a real nice-clear guide in setting up a uv-map and texturing it.

http://www.pagodaproductions.com/tiki/W ... pping.html

It uses unfolding on a sphere and manages to reduce to one seam ... fancy work is still needed to get the texture to cross the seam.
Simon Bridge
[re2dux] [neolite]
"Everything is perfect down to every last flaw..."
HBT: The Book of Verse - Principia Discordia
User avatar
Simon B
---- E L I T E ----
---- E L I T E ----
Posts: 836
Joined: Thu Oct 23, 2008 5:54 am
Location: Red Beach NZ
Contact:

Post by Simon B »

I can do better!!!
Image

Spot the seams!

I used the hard-edge method to create a sphere map of most of the surface, but kept the caps seperate (that's where most distortion is). The polar circle discontinuity is hidden in the top crater edge while the longitude line right in front of you (which is the hard edge) falls across a tesselation edge on the texture - thus it wraps around. Lookee:

Image
... here you see the UV map (top left - with the grid) showing the layout used. The big grid is the spherical map - had to realign the horizontals manually (curses) and it is essential that it goes edge-to-edge.

The circles for the end caps are resized over handy circular features - different for each so the poles get to look different.

In this example you see how modelling and texturing go hand in shoe glove mitten.
Simon Bridge
[re2dux] [neolite]
"Everything is perfect down to every last flaw..."
HBT: The Book of Verse - Principia Discordia
User avatar
JensAyton
Grand Admiral Emeritus
Posts: 6657
Joined: Sat Apr 02, 2005 2:43 pm
Location: Sweden
Contact:

Post by JensAyton »

Tip of the day decade for texturing spheres: use the polar coordinates filter (Filter->Distort->Polar Coordinates… in Photoshop, Filters->Distorts->Polar Coordinates… in GIMP) to work on the polar regions.

In Photoshop, the filter is at “Filter->Distort->Polar Coordinates”. “Rectangular to Polar” lets you see the horrible pinch effect in all its awfulness, and fix it. “Polar to Rectangular” gets you back. Rotate the rectangular-coordinate image 180 degrees to work on the other pole.

In GIMP, it’s “Filter->Distort->Polar coordinates…”. leave “To polar” checked to go to polar coordinates, uncheck it to go back. To work on the south pole, uncheck “Map from top”.

Even more than usual, it’s important to work at a higher resolution than your final output resolution when doing this, since π/4 of your pixels are lost in the transformation and the rest are blurred slightly. Also, if you’re working on a rectangular texture (I suggest a 2:1 aspect ratio, it gives you nice, clean 1:1 pixels at the equator), scale it (up) to a square before doing polar coordinate work.

One day I’d like to have Oolite support cube maps for planets and generate cylinder maps automatically for hardware that doesn’t support cube maps… not that hand-generating cube maps is any easier than this, but they make more efficient use of pixels – you get a more even distribution, with the lowest density (and least distortion) being the same as with cylinder maps.
User avatar
Commander McLane
---- E L I T E ----
---- E L I T E ----
Posts: 9520
Joined: Thu Dec 14, 2006 9:08 am
Location: a Hacker Outpost in a moderately remote area
Contact:

Post by Commander McLane »

Sorry, I feel a bit like the voice of him that crieth in the wilderness, as I repeat myself over and over again. Please bear with me.
  • Planetary textures are not squared. They need to be 512x256, or 1024x512, or so. (You have to cover 360 degrees of longitude, but only 180 degrees of latitude.)
  • There is no need for seamlessness both ways. At the north and south pole the whole length of the texture gets contracted into one dot. Planets are no tori (usually), therefore whoever steps one step further than the north pole does not suddenly find himself at the south pole, just one step away from the north pole, and 180 degrees further east/west. By the way: in many cases it is useful anyway to make the upper and lower end of the texture more or less white, in order to simulate polar caps.
  • The main problem with planetary textures is still that Oolite doesn't wrap them around the planet as you would expect. See here for detailed explanation.
User avatar
JensAyton
Grand Admiral Emeritus
Posts: 6657
Joined: Sat Apr 02, 2005 2:43 pm
Location: Sweden
Contact:

Post by JensAyton »

Commander McLane wrote:
Sorry, I feel a bit like the voice of him that crieth in the wilderness, as I repeat myself over and over again. Please bear with me.
I agree with all your points, and feel they match up nicely with my preceding post. (Well, except the wobbly axis thing which I didn’t mention.)

Edit: I almost forgot, I threw together an example at work.

First, create your horizontally-wrapping planet texture (presented at my high, high working resolution of 512 × 256 pixels):
Image

Stretch it out to a square. This is important! If you don’t do it, you’ll end up with the polar region distorted into an oval in the next step.
Image

Convert to polar coordinates:
Image

Touch up your polar region so it looks smooth and seamless. This, of course, is the easy bit:
Image

Convert back to rectangular coordinates:
Image

Turn it 180° and do the other pole:
Image

Scale back to 2:1 aspect ratio and turn it the right way up again:
Image

Note how it smears out towards each pole, with the top and bottom row being one solid colour. This is the desired result. If you try to “fix” this by cramming in more detail near the poles, you’ll start to get the pinching effect again.

If you start out with a horizontally-wrapping texture, the end result will also wrap. If you start out with a non-wrapping texture, the seam will be visible in the polar projection.
Last edited by JensAyton on Mon Feb 09, 2009 10:54 pm, edited 1 time in total.
User avatar
ZygoUgo
---- E L I T E ----
---- E L I T E ----
Posts: 406
Joined: Mon Nov 17, 2008 4:15 pm
Location: Blighty

Post by ZygoUgo »

I always wondered what that feature was for :oops:
User avatar
Simon B
---- E L I T E ----
---- E L I T E ----
Posts: 836
Joined: Thu Oct 23, 2008 5:54 am
Location: Red Beach NZ
Contact:

Post by Simon B »

In support of the foregoing - notice that the sphere-mapped portion of my wee moon is not a square, nor is it seamless in both directions. (Though the square

Wings does not seem to like non-square maps.
I'd like to see the sphere uv-mapping for that example texture.

The polar-coordinate approach would seem to obviate the need for end-caps and manual moving the parallels about that I had to do. However: wouldn't a detailed texture, like the cratered ones, still show some distortion at the poles anyway?

I'll have a go seeing how the method fares with irregular objects like asteroids (original intent).
Simon Bridge
[re2dux] [neolite]
"Everything is perfect down to every last flaw..."
HBT: The Book of Verse - Principia Discordia
User avatar
JensAyton
Grand Admiral Emeritus
Posts: 6657
Joined: Sat Apr 02, 2005 2:43 pm
Location: Sweden
Contact:

Post by JensAyton »

The mapping for planets is a simple lat/long mapping – pixels are distributed uniformly along the lines of longitude and the equator. There doesn’t seem to be an easy way to do this in Wings 3D, though.
User avatar
JensAyton
Grand Admiral Emeritus
Posts: 6657
Joined: Sat Apr 02, 2005 2:43 pm
Location: Sweden
Contact:

Post by JensAyton »

Here’s an example on an actual planet (atmosphere temporarily removed for clarity – don’t worry, I kept it all in a bag over here).

New texture, now with colours so you can see what’s what:
Image
Image

This shows that the “polar” regions are bigger than they feel in polar projection mode, stretching into the tropics. Making them much smaller would make the pinch effect noticeable. (On the other hand, the equator is distinctly distorted in the polar projection. This is the First Rule of Projecting the Plane Onto a Sphere [or vice versa]: you just can’t win.)

Anyway, here’s the texture on a planet:
Image
The north pole of the texture is close to the middle of the crosshairs. As you can see, or rather not, it’s basically invisible.
User avatar
Pangloss
---- E L I T E ----
---- E L I T E ----
Posts: 303
Joined: Wed Dec 13, 2006 5:57 pm
Location: Scranton, PA (via Stevenage, Herts)

Post by Pangloss »

By the way, I tried skinning the asteroid using a nice rocky repeating texture... but because of the irregular nature of the shape, some parts were too stretched. So asteroids need to be kept bland, unless someone goes overboard with a texture and matching model like this (bottom of page).

Image

Image

Hey, seeing as this page has the texture and the .obj for these two, can't we just use one for our needs?
"All is for the best in this best of all possible worlds..."
Dr.Pangloss, Voltaire's 'Candide'.

Image
User avatar
Cmd. Cheyd
---- E L I T E ----
---- E L I T E ----
Posts: 934
Joined: Tue Dec 16, 2008 2:52 pm
Location: Deep Horizon Industries Manufacturing & Research Site somewhere in G8...

Post by Cmd. Cheyd »

Pangloss-
the images you linked are HTTP 403 - Forbidden.
User avatar
Pangloss
---- E L I T E ----
---- E L I T E ----
Posts: 303
Joined: Wed Dec 13, 2006 5:57 pm
Location: Scranton, PA (via Stevenage, Herts)

Post by Pangloss »

Cmd. Cheyd wrote:
Pangloss-
the images you linked are HTTP 403 - Forbidden.
...drat. I can see 'em because I accessed the page. They're both .obj files, and the thumbnail images of the asteroids, and the OBJ files themselves (and textures) are on the page I linked to.

Sorry about the 403, people.
"All is for the best in this best of all possible worlds..."
Dr.Pangloss, Voltaire's 'Candide'.

Image
User avatar
Simon B
---- E L I T E ----
---- E L I T E ----
Posts: 836
Joined: Thu Oct 23, 2008 5:54 am
Location: Red Beach NZ
Contact:

Post by Simon B »

Pangloss wrote:
Hey, seeing as this page has the texture and the .obj for these two, can't we just use one for our needs?
... check the poly count ...

but ... working on it.
Have a look at how the large asteroids (oxp) do.
Simon Bridge
[re2dux] [neolite]
"Everything is perfect down to every last flaw..."
HBT: The Book of Verse - Principia Discordia
Post Reply