Posted: Sun Mar 14, 2010 5:53 pm
Go for it.. GIMP is your friend..El Viejo wrote:Ooh! I like that Diz... in crimson it would look lovely.
For information and discussion about Oolite.
https://bb.oolite.space/
Go for it.. GIMP is your friend..El Viejo wrote:Ooh! I like that Diz... in crimson it would look lovely.
Yeah... I am learning to use GIMP (slowly), but I already have my decal... Coyote!Diziet Sma wrote:Go for it.. GIMP is your friend..El Viejo wrote:Ooh! I like that Diz... in crimson it would look lovely.
I suspected as much - just didn't know if Griff's code did something sneaky with the transparencies (as much of the other shader codes do)Diziet Sma wrote:Yes, as (I think) mentioned by Griff earlier in the thread, PNG files support varying degrees of transparency, so what you want would be easy to add.DaddyHoggy wrote:Can you do part transparency or do they have to be fully transparent (or not) - just thinking that it would be good to scuff the edges of the decal by increasing transparency at the extremes - fair-wear-and-tear kind of thing.

Code: Select all
PaintColor1 = { type = vector; value = "0.0 0.0 0.0"; };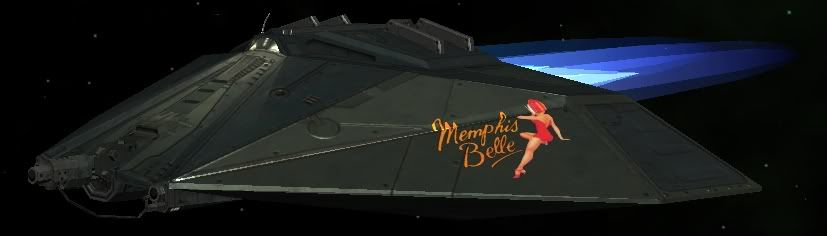
PaintColor2 = { type = vector; value = "0.0 0.0 0.0"; };You should have tried a Google Images search for "Memphis Belle"... this gif was on the first page of results I got back.El Viejo wrote:Agree with that. It was done in haste… and I couldn’t find the clipart I really wanted, which was something like the ‘Memphis Belle’ art. Needed to be against a shiny aluminium hull. Wish I was an artist… I’d create my own.DaddyHoggy wrote:Nice decal but it needs some roughing up, it's just too clean for the ship its painted on to!


Thinking on this subject, as I plan doing a little 'weathering' of decals myself once I have my set made and positioned.. the wear on hull plates tends to be on the edges (naturally) for the most part.. my plan is to apply wear only to those parts of the decal which lie along plate edges, as I feel those would be the areas most susceptible to damage. I think I may need to make some custom camera views to inspect things more closely..lfnfan wrote:Hi Cmd. C. Thanks for the speeedy response!
I have had a look through the thread, but SimonB's weathering deals with full skins (unless I am missing sthg - which is possible). My question is more to do with combining two layers of differing shape whilst 'preserving' only the smaller shape. I have my 'clean' little decal in one layer, and a big o'l picture of a brick wall in another layer.
I can slap the two layers together, and tweak the opacity. But I will always end up with a small decal inside a big ol' rectangle. Unless I spend ages deleting the non-overlapping parts. I'm not describing it well.
Could I create a mask from the decal, then use the mask to make the selection from the 'weathered' layer, and then line the two up manually?
I did find an alternative from the Skinners Den thread:
Simon B wrote:The dirty skins seem more real than the clean ones. The epitome of dirt-effect is acheived with fancy brushes.
GIMP jockey s like myself will appreciate resources: here's a collection of brushes:
http://www.techzilo.com/gimp-brushes/
Of special interest is vector grunge and scratches.
El Viejo, how did you go with colouring the hull underside? I'm about to attempt it, but I'm not too sure of Griff's directions in the section I highlighted red.. I've split off the alpha as directed, but am a little unclear/unsure about recolouring the texture map.. guess I should just give it a whirl. Do you have any tips or steps you can share?Griff wrote:It's not too difficult if you're fairly happy working with colour and alpha channels in an image editing program like photoshop or paintshop pro or GIMP, if you're not, don't worry you'll soon pick it up after a bit of head scratching, it's not too complex.El Viejo wrote:Question... how difficult would it be to add a paint colour to the underside of the Cobra?
It's a very minor thing, but it would complete the 'look'.
basically, this cobra shader uses 2 single colour image maps (similar to greyscale images) to work out where the paint is to go, how it works is these single colour images are recoloured using the paint value in the shipdata.plist and added into the final texture, black of course has RGB values of 0,0,0 and if you add 0 to a value there's no change, so basically in the paintmaps any bits that are are black don't get any paint applied (even though the shader has to actually calculate paint vales for every bit of the ship - one of the reasons that paintmaps are switched off in simple shader mode)
The 2 paintmaps are both in the Griff_cobra_mk3_mainhull_effects.png image, 1 is in the green channel and the other is in the alpha channel. a free program called XnView has a really handy extract channel command that will let you split out the green and alpha channels from the texture, so you can work on them or i could post up my texture file with the layers all seperated out if you'd like to work from that, basically you'll need to paint in some colour into the parts of the paintmap that coincide with the bottom of the hull
edit: i think i might have over complicated things, you could just use xnview to split the alpha from Griff_cobra_mk3_mainhull_diffuse_spec.png and save it somewhere for safekeeping whilst you recolour the rest of texture map in paint or gimp and then use GIMP to add the alpha channel back into the texture and resave it ready for Oolite