Page 6 of 16

Re: Blender 3d Modeling Tutorials

Posted: Fri Nov 18, 2011 10:48 am
by Ironfist
Hi MiMoriarty,

Welcome.
Could it be that the model is so big that you can only see a very small part and that you need to zoom out to see any structure.
Just a thought - ignore if not sensible.

Ironfist

Re: Blender 3d Modeling Tutorials

Posted: Fri Nov 18, 2011 11:45 am
by MiMoriarty
Hello to everyone,

Many thanx for your answers.

I tried to unzoom but I didn't saw a thing. Maybe I shall try to go further.

You can take a look a the 'pre-model' http://vphmm.deviantart.com/gallery/#/d4g71gf. It's a very early state of model/texture for testing of a escort/fighter role ship. I want to use it as base for a trader ship and, later, a frigater.

MiMoriarty

There is an art, it says, or rather, a knack to flying. The knack lies in learning how to throw yourself at the ground and miss. … Clearly, it is this second part, the missing, which presents the difficulties.

Re: Blender 3d Modeling Tutorials

Posted: Fri Nov 18, 2011 5:38 pm
by mandoman
MiMoriarty wrote:
Hello to everyone,

Many thanx for your answers.

I tried to unzoom but I didn't saw a thing. Maybe I shall try to go further.

You can take a look a the 'pre-model' http://vphmm.deviantart.com/gallery/#/d4g71gf. It's a very early state of model/texture for testing
Here is a ladder I have developed in finishing up a model, which I got from Staer9's help, and reading other Blender tutorials.
First I click on "Mesh", at the bottom row of command options in the "Edit Mode", and I pan up to Vertices, in there up to "Remove Doubles" and click on that. If you have been cleaning up your vertex points as you build, or after you initially finish, there shouldn't be any doubles. Then I click on "Mesh" again, pan up to "Normals", and click on "Recalculate The Outside".

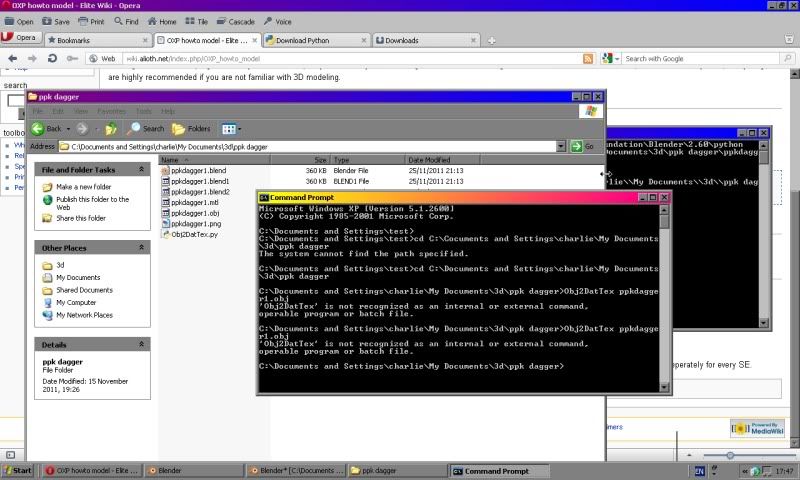
Now, here is a little trick I developed on my own, but one which I'm sure many experts have known of for a long time. After I have performed the above, I use the "A" key to select the whole model, move to the "Mode" box, and I select "Texture Paint". What SHOULD happen to your ship is that it will all turn into a completely white, smooth model, with no see through sections. However, my experience is that it never does that perfectly the first time. Use the middle button of your mouse to turn the model about, by holding the middle mouse button down, kind of like grabbing. As you turn your model about, check it from every angle. If you spot any points on the surface of the model that isn't that smooth white tone, and you can see through, you have to fix that before the model will be one piece, and export correctly to .obj.

To fix the problem of the see through section(s), once each of those sections is located, go back into "Edit Mode". It's best if you repair the holes one at a time, though side by side faces may be all fixed together. But that can get confusing, as you loose track of just exactly which faces were problems.

First, press "Shift/A", so the whole model is now that gray color. Select the see through section as you would select any face on the model, by holding the Shift key down, clicking on all of the Vertex points of the problem face using the right mouse button. If the face doesn't light up orange, there is your first clue to the problem to be fixed. With Vertex points all selected on the (should be) face, click on "Mesh", pan up to "Faces", and click on "Flip Normals". Then go back to "Mesh", pan up to "Normals", and click on "Recalculate The Outside". This is where it becomes a systematic chore. You may see the face light up orange, like any of the correct faces about it, but you can't depend on that. To check to see if flipping the normals has done the trick (sometimes it does, and sometimes not), do the mode select to "Texture Paint" step I described above, and check that face to see if it is solid, or see through.

Second, and this is if flipping the normals didn't do the trick, go back to "Edit Mode", select the Vertex points around the problem face, as described above, then click on "Mesh", pan up to "Faces", and click on "Fill". Now, you can either go back to "Texture Paint" mode to check if that alone did the trick, OR you can just go immediately back to "Mesh", up to "Faces", and click on Solidify. That SHOULD make the face solid. However.....

I discovered one more little trick. To make your model as simple as it can possibly be, you need to make sure there are no doubles, no stand alone vertex points, and no unnecessary faces. That procedure is a whole other tutorial. What you CAN do, after solidifying the problem face, is not so hard, just a little extra work.

Go to a vertex point of the face you just solidified, and zoom in on that point. What you will see is two points, one directly above the other. From what I can tell, solidifying a face causes the new solidified face to appear on top of the open, see through face. So, you Shift, right click on the top vertex point, and then on the one beneath it, and then go to "Mesh", pan up to "Vertices", then up to "Merge", and click on "Merge". What you will get is another drop menu giving you five options, as follows:

Merge At First,
Merge At Last,
Merge At Center,
Merge At Cursor,
Collapse.

Since you want the now raised face to sink down level to the surface of the model, you select "Merge At Last" if you follow my directions above. You could just as easily select the bottom vertex point first, and then the one above, and then select "Merge At First". What ever you like best. Merging the points at the center would still leave you with a slightly raised face, which can come in handy should that be an effect you wish to add to your model. Selecting at cursor doesn't make sense, unless you can put the cursor point to the exact location you desire the merge to occur. Collapsing is usually best for when you want to merge several vertex points all over the model into one vertex. Use with caution. If done as I described, the face SHOULD be a solid part of the model now. Check it by going to the "Texture Paint" mode, which will show that the once see through face is now a smooth, solid white tone, like the rest of the model.

You may have many such see through faces on your model, so you have to address each one before you can do a successful export.

Re: Blender 3d Modeling Tutorials

Posted: Fri Nov 18, 2011 11:27 pm
by MiMoriarty
Ironfist was right :oops: . Now I can resize my own mesh to emulate a cobra's long. :D

Next step will be setting exhaust and textures. I'm not a coder so I'm dicking with an imported shipdata.plist. The oxp is loaded and I can move the ship and look at it with the external views. As soon as I'll place the textures on it, I can't see them by now, I'll be ready to start a detailed version.

Thakx for the tips mandolin!

There is an art, it says, or rather, a knack to flying. The knack lies in learning how to throw yourself at the ground and miss. … Clearly, it is this second part, the missing, which presents the difficulties.

Re: Blender 3d Modeling Tutorials

Posted: Sat Nov 19, 2011 1:27 am
by CommonSenseOTB
MiMoriarty wrote:
Ironfist was right :oops: . Now I can resize my own mesh to emulate a cobra's long. :D

Next step will be setting exhaust and textures. I'm not a coder so I'm dicking with an imported shipdata.plist. The oxp is loaded and I can move the ship and look at it with the external views. As soon as I'll place the textures on it, I can't see them by now, I'll be ready to start a detailed version.

Thakx for the tips mandolin!

There is an art, it says, or rather, a knack to flying. The knack lies in learning how to throw yourself at the ground and miss. … Clearly, it is this second part, the missing, which presents the difficulties.
Yeah, great work mandolin! :D

Oh the wandering minstrel hath a relaxed existence, trading food and shelter for a bard's tale, and soothing the weary travelling with a skillful strumming on the mandolin. Even now I hear such musical interludes coming from yonder inn. Retire! Retire! :)

Re: Blender 3d Modeling Tutorials

Posted: Sat Nov 19, 2011 2:30 pm
by mandoman
CommonSenseOTB wrote:

Yeah, great work mandolin! :D

Oh the wandering minstrel hath a relaxed existence, trading food and shelter for a bard's tale, and soothing the weary travelling with a skillful strumming on the mandolin. Even now I hear such musical interludes coming from yonder inn. Retire! Retire! :)
Who let this joker on the forum, LOL!! :lol:

Re: Blender 3d Modeling Tutorials

Posted: Sat Nov 19, 2011 2:42 pm
by MiMoriarty
MiMoriarty wrote:

Thakx for the tips mandolin!
:shock: Autotext (one of the funny tool on Mac OX Lion) played a good joke on my post. I should disable it. Sorry mandoman.

Re: Blender 3d Modeling Tutorials

Posted: Sat Nov 19, 2011 2:53 pm
by mandoman
Since you want the now raised face to sink down level to the surface of the model, you select "Merge At Last" if you follow my directions above. You could just as easily select the bottom vertex point first, and then the one above, and then select "Merge At First". What ever you like best. Merging the points at the center would still leave you with a slightly raised face, which can come in handy should that be an effect you wish to add to your model. Selecting at cursor doesn't make sense, unless you can put the cursor point to the exact location you desire the merge to occur. Collapsing is usually best for when you want to merge several vertex points all over the model into one vertex. Use with caution. If done as I described, the face SHOULD be a solid part of the model now.
That above was part of my earlier instructional blathering. I am posting again to say that I have run into my first instance where the above action did NOT do the trick. When I merged the solidified section down into the model, the face disappeared again. My suspicion is that I somehow clicked on the bottom vertex points of the new, raised face, and ended up remeshing the face back into a single sided flat surface. I tried to find the correct vertex points, but finally had to just accept the raised face as a fact, so the model would be whole. I guess there are always exceptions to everything in modeling.
:shock: Autotext (one of the funny tool on Mac OX Lion) played a good joke on my post. I should disable it. Sorry mandoman.
LOL!! Don't worry about that. My handle is actually based on the fact that I play a mandolin, so your Mac wasn't necesarily wrong. My comment was aimed at the oxp genius (seriously), CommonSenseOTB. :D

Re: Blender 3d Modeling Tutorials

Posted: Sat Nov 19, 2011 4:34 pm
by MiMoriarty
mandoman, many thanks for the fix. :)

The Crusader mesh was really light, under 120 faces. I believe I have no doubles. I had already flipped all the faces with inverted normals.

I've managed in the last hours to tweak the model size into an oxp that works fine, proper exhaust and fore laser locations. Diffuse and effects textures are already loaded and visible in Oolite. I'll try next to get in the normal map and see how it works.

Nice saturday!

Re: Blender 3d Modeling Tutorials

Posted: Sat Nov 19, 2011 6:12 pm
by Staer9
Ah! It is so nice to see others learning and starting to write their own tutorials,
Great work Mandoman!

Re: Blender 3d Modeling Tutorials

Posted: Sat Nov 19, 2011 8:28 pm
by mandoman
MiMoriarty wrote:
mandoman, many thanks for the fix. :)

The Crusader mesh was really light, under 120 faces. I believe I have no doubles. I had already flipped all the faces with inverted normals.

I've managed in the last hours to tweak the model size into an oxp that works fine, proper exhaust and fore laser locations. Diffuse and effects textures are already loaded and visible in Oolite. I'll try next to get in the normal map and see how it works.

Nice saturday!
Hey, congrats. Sounds like you have the beginnings whipped. :D

Re: Blender 3d Modeling Tutorials

Posted: Sat Nov 19, 2011 8:29 pm
by mandoman
Staer9 wrote:
Ah! It is so nice to see others learning and starting to write their own tutorials,
Great work Mandoman!
Thanks. I hope it helped more than it did any damage. :)

Re: Blender 3d Modeling Tutorials

Posted: Sun Dec 04, 2011 5:54 pm
by Amaranth
Can anyone help with the following problem please. I have just installed Python 2.7 and the Obj 2 Dat widget. I am trying to export a model into Oolite so I can try and learn the rest of the model creation process. However

Image

What am I doing wrong please?


Also, does the widget also specify the contents of the mtl file into the dat? as an OXP models folder only has dat's , not mtl's. And do I just stick the texture straight into a textures folder and Oolite will find it anyway?

Re: Blender 3d Modeling Tutorials

Posted: Sun Dec 04, 2011 6:01 pm
by Okti

Code: Select all

set PYTHONPATH=%PYTHONPATH%;C:\Python27
python obj2dattext.py yourobj.obj
That is a batch file I use if it may help.

Re: Blender 3d Modeling Tutorials

Posted: Sun Dec 04, 2011 6:02 pm
by Thargoid
You've forgotten the .py in Obj2DatTex.

The correct command line should be Obj2DatTex.py ppkdagger1.obj . Also both the obj file, it's associated mtl file plus the script file should be in the same directory that you are currently in (as yours are, I just say this for completeness).