I thought that it may be a good idea to have a thread specifically aimed at discussing any aspects with regard to using Wings 3D for producing models in Oolite.
Therefore to kick off the topic is anyone able to advise exactly how a model produced in wings 3D but being textured in a separate graphics package, (Gimp for example), can be viewed in Wings 3D as the texturing progresses.
I did manage to do this some time ago so know that it is possible however I can’t seem to get it to work now.
It is a much easier way to check how texturing is progressing compared to viewing the models I Oolite as you can rotate and zoom in/out as very easily.
Using Wings 3D to produce models for Oolite
Moderators: another_commander, winston
-
Shipbuilder
- ---- E L I T E ----

- Posts: 877
- Joined: Thu May 10, 2012 9:41 pm
- Location: Derby
Using Wings 3D to produce models for Oolite
The GalTech Industries Corporation - Building ships to populate the galaxies.
Increase the variety of ships within your Ooniverse by downloading my OXPs
Flying the [wiki]Serpent_Class_Cruiser[/wiki] "Thargoid's Bane"
Increase the variety of ships within your Ooniverse by downloading my OXPs
Flying the [wiki]Serpent_Class_Cruiser[/wiki] "Thargoid's Bane"
-
Selezen

- ---- E L I T E ----
- Posts: 2530
- Joined: Tue Mar 29, 2005 9:14 am
- Location: Tionisla
- Contact:
Re: Using Wings 3D to produce models for Oolite
Create your model.
Create the UV map and export it as an external file (PNG is always good). Make sure you have the Outliner window visible in Wings.
Open the PNG file in whatever graphics app you use and start to create your magic. As you work and save your file, go back to Wings and in the outliner window right click the texture and click "Refresh". The work you have done will instantly be visible.
Yeah.
-
Tricky

- ---- E L I T E ----
- Posts: 821
- Joined: Sun May 13, 2012 11:12 pm
- Location: Bradford, UK. (Anarchic)
Re: Using Wings 3D to produce models for Oolite
Hmm...
Created a simple cone and it was on the Y-axis, really want it on the Z-axis. How do you set that up? Tried rotating it and got really confused.
Would it be best if I read the FAQ on the Wings3D site?
Created a simple cone and it was on the Y-axis, really want it on the Z-axis. How do you set that up? Tried rotating it and got really confused.
Would it be best if I read the FAQ on the Wings3D site?

-
Shipbuilder
- ---- E L I T E ----
- Posts: 877
- Joined: Thu May 10, 2012 9:41 pm
- Location: Derby
Re: Using Wings 3D to produce models for Oolite
Selezen - Thanks I'll give that a try tomorrow (Certainly quicker than restarting Oolite and trying to view it in there).
The GalTech Industries Corporation - Building ships to populate the galaxies.
Increase the variety of ships within your Ooniverse by downloading my OXPs
Flying the [wiki]Serpent_Class_Cruiser[/wiki] "Thargoid's Bane"
Increase the variety of ships within your Ooniverse by downloading my OXPs
Flying the [wiki]Serpent_Class_Cruiser[/wiki] "Thargoid's Bane"
-
Shipbuilder
- ---- E L I T E ----
- Posts: 877
- Joined: Thu May 10, 2012 9:41 pm
- Location: Derby
Re: Using Wings 3D to produce models for Oolite
Tricky you can read the FAQ however I found when starting out with Wings 3D that I picked it up quicker just playing around with the programme. I also came across some interesting effects quite by accident in the processTricky wrote:Hmm...
Created a simple cone and it was on the Y-axis, really want it on the Z-axis. How do you set that up? Tried rotating it and got really confused.
Would it be best if I read the FAQ on the Wings3D site?
However getting back to your question - Follow the steps below.
1) Press space to make sure that everything is unselected.
2) Select the red cube icon at the top of the screen (This tells Wings that you want to select an entire object not just a face, line or node).
3) Left click on the cone you want to rotate (It should now turn red).
4) Right click and select rotate from the menu.
5) Select X (Because you are rotating it about the x axis so that it will align with the Z axis).
6) Press the tab button and type 90 (This will rotate the cone by 90 degrees which will align it along the z axis).
7) If the cone is aligned on the z axis but you want it to point in the other direction undo the last step and repeat steps 4 to 6 but type -90 instead of 90.
Your cone should now be correctly rotated.
Oh and one more tip If you are designing a ship make sure that the front of the ship is pointing along the Z axis in the positive Z direction (Towards the bottom left corner of you screen when using the 3D view). On my first attempt I aligned the ship up on the x axis – this resulted in the ship flying sideways when I incorporated the model in to an oxp and tested it in Oolite.
Hope that this helps. let me know if you have any further queries.
The GalTech Industries Corporation - Building ships to populate the galaxies.
Increase the variety of ships within your Ooniverse by downloading my OXPs
Flying the [wiki]Serpent_Class_Cruiser[/wiki] "Thargoid's Bane"
Increase the variety of ships within your Ooniverse by downloading my OXPs
Flying the [wiki]Serpent_Class_Cruiser[/wiki] "Thargoid's Bane"
-
Tricky
- ---- E L I T E ----
- Posts: 821
- Joined: Sun May 13, 2012 11:12 pm
- Location: Bradford, UK. (Anarchic)
Re: Using Wings 3D to produce models for Oolite
This is where I got to without the confusion.Shipbuilder wrote:Tricky you can read the FAQ however I found when starting out with Wings 3D that I picked it up quicker just playing around with the programme. I also came across some interesting effects quite by accident in the processTricky wrote:Hmm...
Created a simple cone and it was on the Y-axis, really want it on the Z-axis. How do you set that up? Tried rotating it and got really confused.
Would it be best if I read the FAQ on the Wings3D site?
However getting back to your question - Follow the steps below.
1) Press space to make sure that everything is unselected.
2) Select the red cube icon at the top of the screen (This tells Wings that you want to select an entire object not just a face, line or node).
3) Left click on the cone you want to rotate (It should now turn red).
4) Right click and select rotate from the menu.
Ah! The <TAB> key.Shipbuilder wrote:5) Select X (Because you are rotating it about the x axis so that it will align with the Z axis).
6) Press the tab button and type 90 (This will rotate the cone by 90 degrees which will align it along the z axis).
I'm used to the Z-axis being positive when going into the 3D model, ie north-east.Shipbuilder wrote:7) If the cone is aligned on the z axis but you want it to point in the other direction undo the last step and repeat steps 4 to 6 but type -90 instead of 90.
Your cone should now be correctly rotated.
Oh and one more tip If you are designing a ship make sure that the front of the ship is pointing along the Z axis in the positive Z direction (Towards the bottom left corner of you screen when using the 3D view). On my first attempt I aligned the ship up on the x axis – this resulted in the ship flying sideways when I incorporated the model in to an oxp and tested it in Oolite.
Will do. I'm sure there will be many other forumites that have questions also.Shipbuilder wrote:Hope that this helps. let me know if you have any further queries.
-
Rese249er
- ---- E L I T E ----
- Posts: 647
- Joined: Thu Jun 07, 2012 2:19 pm
- Location: Well, I WAS in G3...
Re: Using Wings 3D to produce models for Oolite
That's my cue. Having trouble converting from .obj to .dat. Think it's cause my comp has python 2.7. Any idea how to get Ubuntu to switch down to 2.6?
Got all turned around, lost my nav connection... Where am I now?
-
Shipbuilder
- ---- E L I T E ----
- Posts: 877
- Joined: Thu May 10, 2012 9:41 pm
- Location: Derby
Re: Using Wings 3D to produce models for Oolite
Rese249er - Python version 2.7.3 certainly works ok as I use it with the models I produce. I also understand that you can use python version 2.6 ok but haven't used that myself. Don’t however install the latest python software i.e. versions series 3 as this does not work.
I will post a link where an .obj to .dat file converter can be downloaded later today. It's basically a folder where you drop the .obj and .mlt files produced by Wings then change the name of the model in the config file to whatever you have called the model you are wanting to convert. Once you have done this all you do is double click the config file icon and the .dat file is produced.
I’ll provide some more detailed information when I upload the folder when I get home (This isn’t something that I have developed personally. I came across it some time ago while trying to do what you are looking to do now so I can’t take the credit for the converter but I can confirm that it works very well).
Out of interest what software have you got installed to edit script. If you don't have one Vim is free to download and works well.
The GalTech Industries Corporation - Building ships to populate the galaxies.
Increase the variety of ships within your Ooniverse by downloading my OXPs
Flying the [wiki]Serpent_Class_Cruiser[/wiki] "Thargoid's Bane"
Increase the variety of ships within your Ooniverse by downloading my OXPs
Flying the [wiki]Serpent_Class_Cruiser[/wiki] "Thargoid's Bane"
-
Rese249er
- ---- E L I T E ----
- Posts: 647
- Joined: Thu Jun 07, 2012 2:19 pm
- Location: Well, I WAS in G3...
Re: Using Wings 3D to produce models for Oolite
A basic text editor. I've used it to modify a few scripts from other OXP's, so I know it works.
Got all turned around, lost my nav connection... Where am I now?
-
Shipbuilder
- ---- E L I T E ----
- Posts: 877
- Joined: Thu May 10, 2012 9:41 pm
- Location: Derby
Re: Using Wings 3D to produce models for Oolite
Selezen - I've just tried that and whilst the small icon of the UVmap in the outliner box clearly shows the texture that I am working on this texture is not being applied to the 3D model that I can rotate and look at close upSelezen wrote:Create your model.
Create the UV map and export it as an external file (PNG is always good). Make sure you have the Outliner window visible in Wings.
Open the PNG file in whatever graphics app you use and start to create your magic. As you work and save your file, go back to Wings and in the outliner window right click the texture and click "Refresh". The work you have done will instantly be visible.
Yeah.
The GalTech Industries Corporation - Building ships to populate the galaxies.
Increase the variety of ships within your Ooniverse by downloading my OXPs
Flying the [wiki]Serpent_Class_Cruiser[/wiki] "Thargoid's Bane"
Increase the variety of ships within your Ooniverse by downloading my OXPs
Flying the [wiki]Serpent_Class_Cruiser[/wiki] "Thargoid's Bane"

Re: Using Wings 3D to produce models for Oolite
You may need to apply the texture to your object. In the Outliner, left click on the texture name, and then right-click on it and select "Pick up image". Then left click on the material for your object (you can have more than one for multiple texture files on the same object, if you want), and right-click and select "Drop picked object". It will then ask you what sort of texture it is - select Diffuse.
That should apply the texture file to the object, and automatically update it when you refresh.
That should apply the texture file to the object, and automatically update it when you refresh.
-
Shipbuilder
- ---- E L I T E ----
- Posts: 877
- Joined: Thu May 10, 2012 9:41 pm
- Location: Derby
Re: Using Wings 3D to produce models for Oolite
Thanks for the feedback cim however for whatever reason I still can't get the texture to apply to the actual model 
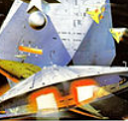
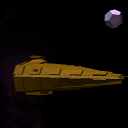
I don't know if this gives any clues but in the outliner box I have my png format file named cylonraidermk1_auv and also a material named default.
I have carried out the steps noted in your E-Mail and have applied the Drop picked object option to the default material. All seems to be ok to this point except I can't get it applied to the model.
The GalTech Industries Corporation - Building ships to populate the galaxies.
Increase the variety of ships within your Ooniverse by downloading my OXPs
Flying the [wiki]Serpent_Class_Cruiser[/wiki] "Thargoid's Bane"
Increase the variety of ships within your Ooniverse by downloading my OXPs
Flying the [wiki]Serpent_Class_Cruiser[/wiki] "Thargoid's Bane"
Re: Using Wings 3D to produce models for Oolite
Looking at mine in Wings 3D, none of them are using the default material, so try:
- left click on "default", select "Duplicate".
- select your model, switch to face selection mode so all faces selected
- go to "default2" and use "assign to selection"
- drop the image onto "default2" as before.
- left click on "default", select "Duplicate".
- select your model, switch to face selection mode so all faces selected
- go to "default2" and use "assign to selection"
- drop the image onto "default2" as before.
-
Eric Walch

- Slightly Grand Rear Admiral
- Posts: 5536
- Joined: Sat Jun 16, 2007 3:48 pm
- Location: Netherlands
Re: Using Wings 3D to produce models for Oolite
I remember having similar problems. For me, the fastest solution was always to export it as obj file, edit the materials there manually and than re-import it in wings.Shipbuilder wrote:Thanks for the feedback cim however for whatever reason I still can't get the texture to apply to the actual model
UPS-Courier & DeepSpacePirates & others at the box and some older versions
-
Selezen
- ---- E L I T E ----
- Posts: 2530
- Joined: Tue Mar 29, 2005 9:14 am
- Location: Tionisla
- Contact:
Re: Using Wings 3D to produce models for Oolite
<confused>
The full steps are:
Select object
Right click object
Select UV Mapping
right click object in AutoUV Segmenting window
Select Continue then Unfolding
In AutoUV window, move, scale and stitch to your heart's content.
Once complete, right click on AutoUV window and select Create Texture
Select your desired resolution and click OK
Close AutoUV window.
in outliner you have two items with _auv in the name - one is the material and one is the texture (texture indicated with little thumbnail).
I always rename the texture to _tex rather than _auv. Not sure if that's important...
Right click on the texture filename and click make External.
In the save dialog, make sure to select PNG format and leave the filename intact.
Now, when you open the file in editor, modify it and save it again, if you right click the texture name in Wings selecting Refresh will update the applied texture. I don't know of any reason why that wouldn't work. I just did it as I typed this and it worked perfectly.
it might be worth making sure that the image editor you're using is saving the file in the right format.